
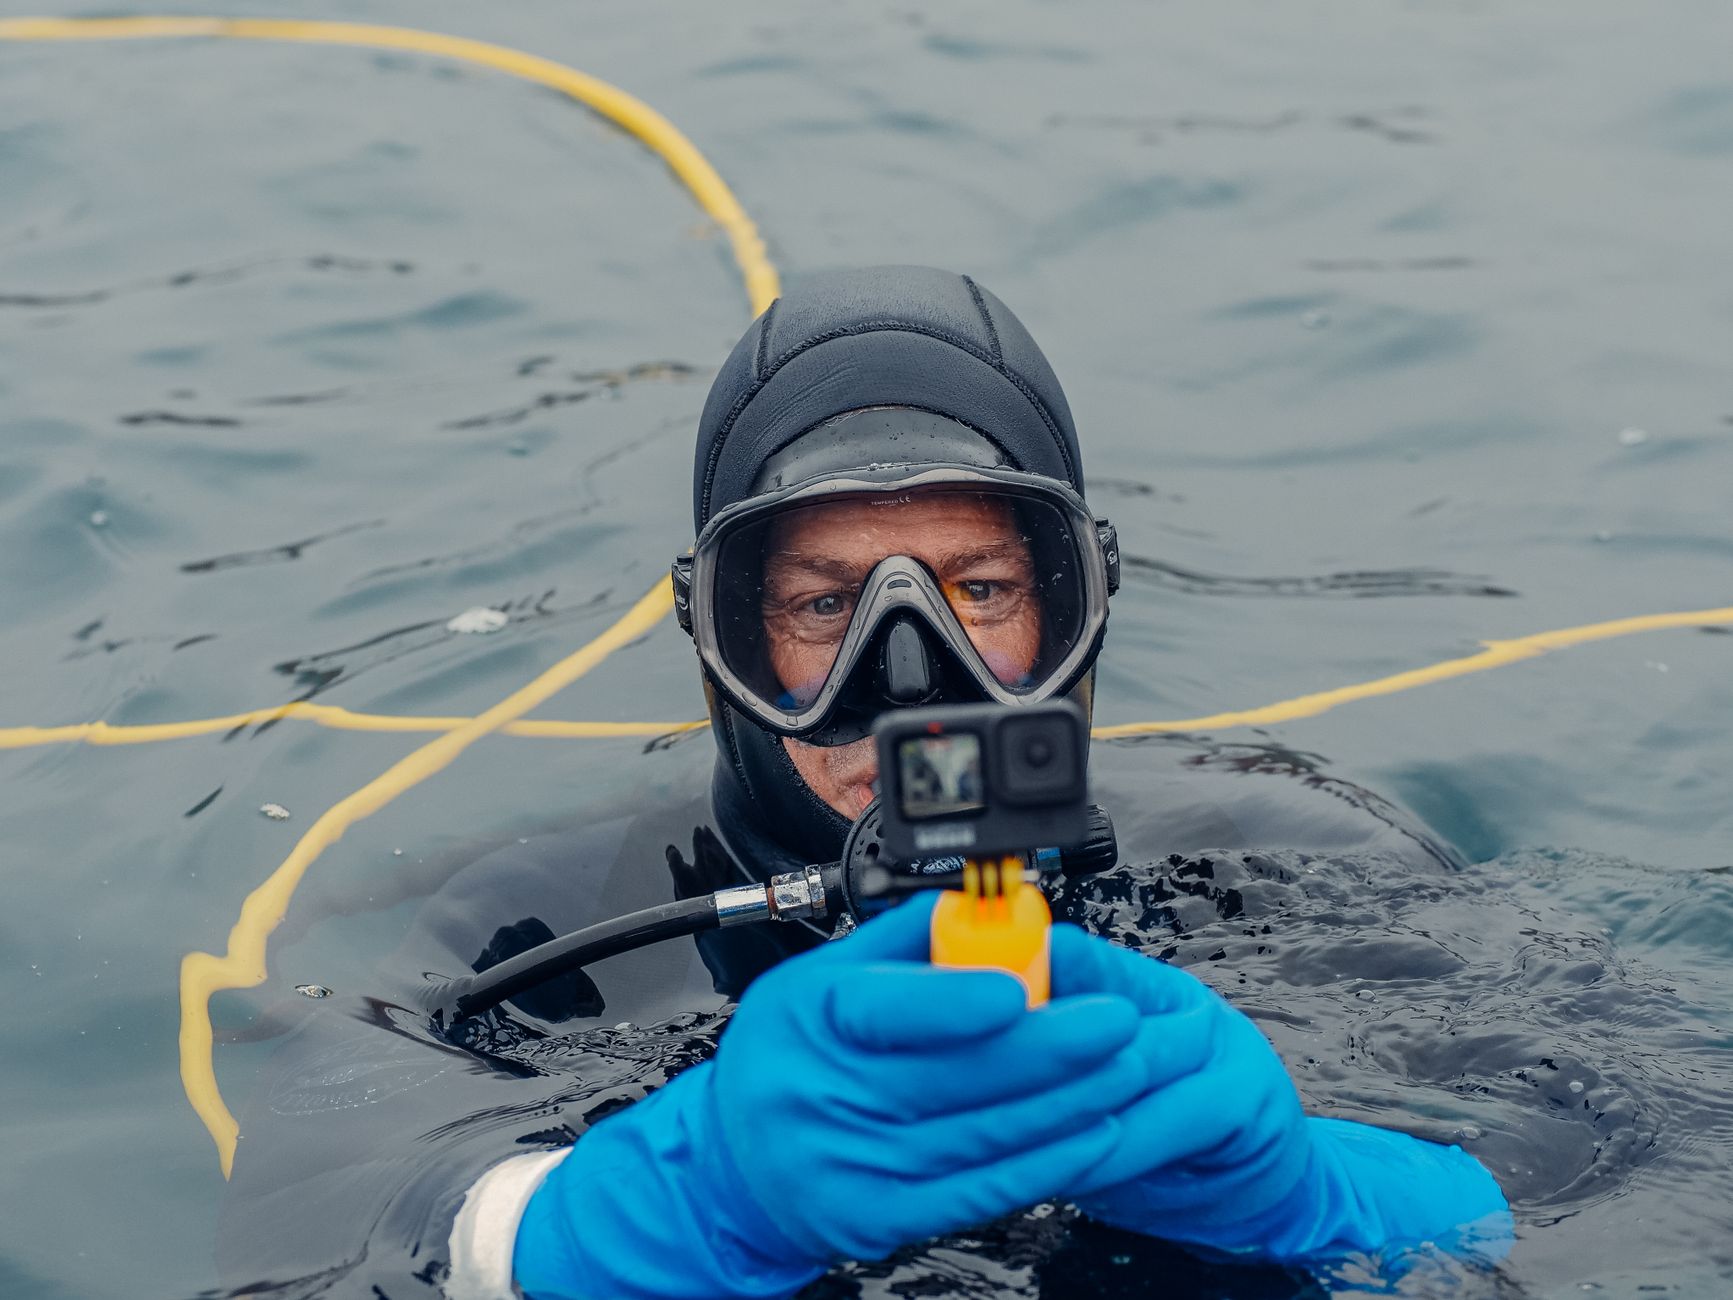
Forget the intimidating, expensive DSLR rigs you see pros using! I'm about to reveal the surprisingly simple, budget-friendly underwater photography gear I started with as a complete beginner – gear that allowed me to capture breathtaking marine moments from the moment I dipped my toes in. Get ready to dive into a world of vibrant corals and curious fish, proving you don't need a pro budget to shoot like one.
## My Secret Beginner Underwater Photography Gear (It's NOT What You Think!)
The first time I saw a picture of a sea turtle gliding gracefully through crystal-clear water, sunlight dappling its shell, I was absolutely mesmerized. I had to capture that feeling, that moment, for myself. But then reality hit: the incredible underwater photos I saw online were all shot with massive, complex-looking camera rigs that probably cost more than my entire travel fund. My dream of becoming an underwater photographer felt like it was sinking faster than a lead anchor.
I pictured myself hauling a giant camera housing, fiddling with settings I didn't understand, and accidentally flooding thousands of dollars worth of equipment. The thought alone was enough to make me want to stick to landlocked landscapes. But my wanderlust, and my deep love for the ocean, wouldn't let me give up so easily. I knew there had to be another way.
Fast forward a few years, countless dives, and an SD card full of vibrant marine life, and I’m here to tell you: you don’t need to mortgage your house to start capturing incredible underwater photos. In fact, the gear I started with, and still frequently use for its sheer convenience and reliability, is probably sitting in your backpack, or at least won't require a second mortgage.
Prepare for a revelation, because my go-to beginner underwater photography kit is probably not what you'd expect.
### The Unlikely Heroes: My Go-To Beginner Underwater Cameras
When I first started diving in places like the vibrant reefs of Palawan in the Philippines and the cenotes of Mexico's Yucatán Peninsula, I was convinced I needed a fancy mirrorless camera in a bulky housing. My budget, however, had other plans. So, I improvised. And it turned out to be the best decision I ever made.
My secret weapons?
1. A Mid-Range GoPro (e.g., Hero 7, 8, or 9): Yes, the humble action camera! While newer models are out, the Hero 7-9 series offers fantastic video and photo capabilities, especially when paired with the right accessories. I snagged my Hero 7 Black on a Black Friday deal for around $250 a few years back. It’s compact, robust, and designed for adventure – perfect for beginners who are still getting their buoyancy sorted.
2. My Smartphone (iPhone 11 Pro) in a Universal Waterproof Housing: This is where it gets really "unexpected." For quick dips, snorkeling, or even shallow dives (within its rated depth), my phone in a high-quality housing became my secret weapon. I invested in a decent universal housing, like the Seashell SS-2 or a similar brand, for about $100-$150. These housings are often rated for up to 40-60 meters (130-200 feet), which is more than enough for recreational diving.
Why these two? Because they’re affordable, accessible, and have an incredibly shallow learning curve. You’re already familiar with how they operate, which means less time fumbling with controls underwater and more time focusing on marine life and your diving technique.
### Why This "Budget" Setup Works Wonders
Let's be real: when you're just starting out, your biggest challenges aren't your camera settings; they're your buoyancy, your air consumption, and not kicking the coral! Having a simple, intuitive camera allows you to focus on becoming a better diver, which in turn makes you a better underwater photographer.
* Cost-Effectiveness: A GoPro (even a slightly older model) is a fraction of the cost of a dedicated underwater camera system. A good universal phone housing is even cheaper. This frees up your budget for more dives, better training, or that liveaboard trip to Komodo!
* Portability & Durability: Both GoPros and phone housings are compact and lightweight. They easily fit into your dive bag without adding significant bulk. And let's face it, they're built to withstand a bit of rough and tumble, which is reassuring when you're clambering onto a zodiac in choppy seas. My GoPro has survived countless drops and bumps, and my phone housing has kept my precious iPhone bone dry through dozens of dives around the Similan Islands.
* Ease of Use: You already know how to use your phone. The learning curve for a GoPro is minimal. This means less frustration and more enjoyment. You can quickly switch between photo and video, adjust basic settings, and review your shots right on the spot.
Focus on Fundamentals: With less gear to worry about, you can concentrate on core underwater photography principles: lighting, composition, getting close (but not too close!), and understanding marine behavior. These skills are transferable to any* camera system you might upgrade to later.
### Essential Accessories That Elevate Your Shots (Still Budget-Friendly!)
While the cameras themselves are surprisingly simple, a few crucial (and affordable) accessories will dramatically improve your underwater photos. Think of them as your secret sauce.
1. Red/Magenta Filter (Approx. $20-$40): This is non-negotiable for GoPros and highly recommended for phone housings. As you descend, water absorbs red light, leaving everything looking blue-green and washed out. A red filter (for blue water) or a magenta filter (for green water, like some lakes or temperate oceans) corrects this color shift, bringing back those vibrant reds, oranges, and yellows of corals and fish. I bought a simple snap-on filter for my GoPro Hero 7 before a trip to Raja Ampat, and the difference was night and day. Without it, my photos looked flat; with it, the corals popped with color!
2. Anti-Fog Inserts (Approx. $5 for a pack): Essential! Humidity and temperature changes can cause your camera housing to fog up, ruining your shots. These small silica gel packets absorb moisture. Just pop one or two into your housing before sealing it. A small investment that saves a lot of heartache.
3. Floating Hand Grip or Pole (Approx. $15-$30): This prevents your camera from sinking to the bottom if you accidentally let go. Crucial for both safety and preventing damage. It also provides a more stable grip for smoother video and steadier photos. I use a bright yellow floating grip that's easy to spot if it ever slips away.
4. Small LED Video Light (Optional, but highly recommended for ~ $50-$100): While natural light is great for shallow water, a small, inexpensive video light can work wonders in deeper water or for bringing out colors in shaded areas. Look for one that's compact, waterproof, and has a decent lumens output (e.g., 1000-2000 lumens). It helps restore lost colors and adds a beautiful pop to your subjects. I picked up a simple 1200-lumen light for about $60 before a night dive in Koh Lanta, and it transformed my shots of bioluminescent plankton and nocturnal creatures.
5. Microfiber Cloths: Always have a few dry ones on hand to wipe your lens port before getting in the water. Water droplets or smudges will ruin your photos.
Total cost for this entire setup, assuming you already own a smartphone: roughly $400-$600 (GoPro + housing + filters + floaty + light). That’s significantly less than a professional rig, and it delivers incredible results!
### My Journey: From Blurry Blues to Vibrant Vistas
My first few dives with my GoPro Hero 7 were, shall we say, "learning experiences." My photos were blue, blurry, and often featured the back of my dive buddy's head. I was struggling with buoyancy, frantically trying to press the shutter button, and forgetting about the filter.
My turning point came during a dive in the famous Maya Bay, Thailand (after its reopening, of course!). We were drifting over a vibrant coral garden, and a small reef shark gracefully swam by. I remembered my red filter, clicked it on, focused on my breathing, and tried to be as still as possible. I aimed, pressed the shutter, and held my breath.
Later, reviewing the shots, one stood out. The shark wasn't perfectly sharp, but the colors of the coral were stunning, the water a beautiful azure, and the shark clearly visible. It was my first "keeper." That moment ignited a fire in me.
I started applying simple techniques:
* Get Closer: Water absorbs light and clarity. The closer you are to your subject, the better your photo will be. "Think feet, not zoom!"
* Shoot Upwards (When Possible): Using the sun as a natural backlight creates dramatic silhouettes and stunning sunbursts. Try to get below your subject and shoot towards the surface.
* Patience is Key: Don't chase marine life. Find a good spot, be still, and let the ocean come to you. Often, curious fish will approach if you're calm.
* Master Your Buoyancy: This is the golden rule. Good buoyancy means you're not stirring up sediment, not damaging coral, and can hold still for your shots.
* Use Burst Mode (GoPro): For fast-moving subjects, burst mode captures multiple frames quickly, increasing your chances of getting a sharp shot.
* Clean Your Lens Port: Before every single dive, wipe the front of your housing with a microfiber cloth. Even a tiny smudge can cause blurry photos.
My phone in its housing also surprised me. During a snorkeling trip in Coron, Palawan, I captured some incredible shots of vibrant clownfish darting through anemones, thanks to its excellent macro capabilities and my trusty red filter. The convenience of being able to immediately edit and share on Instagram was a huge bonus!
### When to Think About Upgrading (And How to Know)
Eventually, as your skills grow and your passion deepens, you might start craving more control over your images. You'll want to adjust aperture, shutter speed, and ISO manually. You'll want the superior image quality of a larger sensor.
You'll know it's time to consider upgrading when:
* You consistently feel limited by your GoPro or phone's settings (e.g., struggling in low light, wanting more creative control over depth of field).
* You're getting consistently good shots with your beginner gear and want to push your artistic boundaries.
* You've saved up! Upgrading to a mirrorless or DSLR system with a housing and strobes is a significant investment (think $2,000 - $10,000+).
But here’s the beauty of starting simple: by the time you're ready to upgrade, you'll have honed your underwater photography fundamentals. You'll know why you need certain features and how to use them effectively. You won't be buying expensive gear just to fumble with it; you'll be investing in tools that empower your already developed skills.
### Dive In, The Water's Fine (And Full of Photo Ops!)
My journey into underwater photography began with a simple desire and a very modest budget. It taught me that passion, patience, and a few smart choices can open up a world of creative possibilities. You don't need the most expensive gear to capture the magic of the ocean. You just need to start.
So, ditch the intimidation, grab your GoPro or your smartphone and a good housing, and get out there! The vibrant reefs of Raja Ampat, the mysterious wrecks of Truk Lagoon, or even your local dive spot are waiting for you to capture their beauty.
What are you waiting for? Dive in, start snapping, and share your incredible underwater world with us!
What unexpected gear have you used to capture amazing travel photos? Share your stories and tips in the comments below!
---
(Want to see more of my underwater adventures and beginner photography tips? Follow me on Instagram @TripsoraDives and tag your own beginner underwater shots with #TripsoraUnderwater!)
---
Visual journey


Tags
Share this adventure
Join the travel community
New adventures, cultural insights and travel inspiration, straight to your inbox.
We may receive a commission if you click on a link and buy a product, service or policy, at no extra cost to you. How affiliate links work.
Other angles on this trip
These notes are written by AI to show how different kinds of traveller might see this destination. They are not comments from real readers.