

Tired of astronomical roaming bills or constantly hunting for Wi-Fi? I'm spilling the ultimate travel secret that guidebooks conveniently omit: how to get a local SIM card and slash your phone costs by hundreds, freeing you to explore without limits. This isn't just about saving money; it's about unlocking a deeper, more authentic travel experience.
## The Roaming Rip-Off: How I Learned to Ditch the Tourist Trap and Save Hundreds
"Your bill this month is... €450."
I remember the exact moment my jaw hit the floor. I’d just returned from a two-week whirlwind through Italy, full of pasta, picturesque piazzas, and apparently, data charges that could fund a small country. I’d "thought" I was being smart, turning off data roaming most of the time, relying on hotel Wi-Fi. But every time I needed Google Maps for a quick navigation, or shared a quick snap of the Colosseum to Instagram, the meter was running. My "smart" strategy had backfired spectacularly, leaving me with a bill that stung worse than a Roman sunburn.
That moment was my travel "aha!" moment. It was clear: the traditional ways of staying connected abroad were either cripplingly expensive or frustratingly unreliable. Guidebooks mentioned Wi-Fi spots and expensive international roaming packages, but they glossed over the real game-changer – the local SIM card. It felt like a secret whispered only among seasoned travelers, a sacred text omitted from mainstream travel bibles.
I vowed never again to be held hostage by exorbitant data fees. Since then, I’ve traveled through dozens of countries, from the bustling markets of Bangkok to the serene fjords of Norway, always connected, always saving, and always with a local SIM card in my pocket. And today, I’m pulling back the curtain to share this ultimate travel hack with you, so you can save hundreds, connect like a local, and travel smarter, not harder.
### The Guidebook Gap: Why No One Tells You This (and Why They Should!)
Why do guidebooks often skip the detailed lowdown on local SIMs? Part of it is the sheer pace of change. Phone plans, prices, and regulations evolve faster than a street vendor can whip up a Pad Thai. What’s true today might be slightly different next month. Plus, traditional guidebooks focus on destinations, not necessarily the nitty-gritty of digital logistics. For them, it’s easier to just say, "Wi-Fi is widely available," leaving you to discover the painful truth about slow connections, insecure networks, and data limits.
The truth is simple:
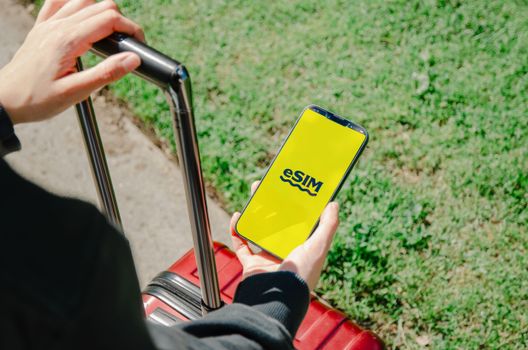
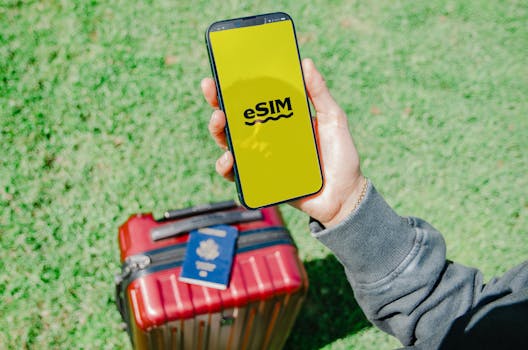
your home country's mobile plan wants to make money off you when you travel. They offer "international roaming packages" that sound good but are still a fraction of the data for double the price. Pocket Wi-Fi rentals add another device to your inventory and often come with rental fees and daily limits. E-SIMs are becoming a fantastic alternative, especially for short trips or specific regions, but they can still be pricier than a local physical SIM, and not all phones support them.
The local SIM card? It's the undisputed champion for value, immersion, and sheer convenience. It transforms your phone into a true local device, often giving you unlimited data, local call minutes, and even text messages, all for a fraction of what you’d pay for a single day of roaming.
### Decoding the Local SIM Scene: Your Pre-Flight Checklist
Before you even touch down, a little prep work goes a long way.
1. Is Your Phone Unlocked? This is the golden rule. If you bought your phone through a contract, it might be "locked" to your home carrier. You'll need to contact them to unlock it before you travel. If you bought it outright, it's likely already unlocked. This is non-negotiable – a locked phone can't use another carrier's SIM.
2. Research Local Carriers: A quick Google search for "[Country Name] best SIM card for tourists" or "[Country Name] mobile carriers" will give you a head start. In Thailand, for instance, AIS, DTAC, and TrueMove H are major players. In Italy, you’ll find TIM, Vodafone, and WindTre. Knowing the main providers helps you identify official stores.
3. Understand Plan Types:
* Pre-paid: This is what you want. You pay upfront for a set amount of data, calls, and texts for a specific period (e.g., 7 days, 15 days, 30 days). No contracts, no surprises.
* Post-paid: These are contract-based plans, usually requiring local residency and a bank account. Avoid these.
4. Documents Needed: In most countries, you'll need your passport for identification when purchasing a SIM card. It's a standard registration requirement. Keep it handy.
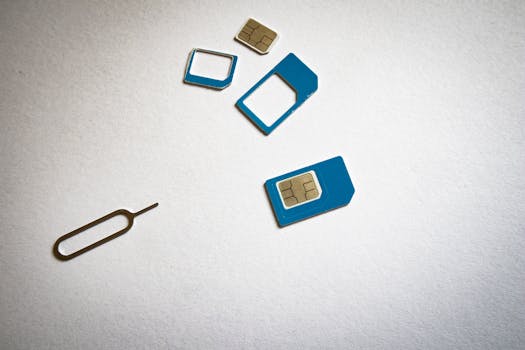
5. SIM Card Size: Most modern smartphones use a Nano-SIM. The vendors usually have all sizes (standard, micro, nano) and can punch out the correct one, but it’s good to be aware.
### My First Dive: A Lifesaving Connection in the Land of Smiles (Thailand)
My first truly successful local SIM purchase was in Thailand, and it completely changed my travel game. After my Italian fiasco, I landed at Bangkok's Suvarnabhumi Airport determined to do it right.
Step 1: Where to Go (Airport vs. City)
Upon arrival, you'll often see kiosks for major carriers right in the arrivals hall. These are incredibly convenient, though sometimes slightly more expensive than in-city stores. For my first go, the airport kiosk for AIS was a godsend. I knew I needed to get to my hostel, and having data immediately was worth the slight premium.
* Pro Tip: If you're arriving late or want to save a few baht, head to an official carrier store in the city or even convenience stores like 7-Eleven (though staff there might have less English and fewer plan options).
Step 2: The Purchase Process
I walked up to the AIS counter, smartphone in hand. "Hello, I need a tourist SIM card, please," I said, pointing to my phone. The friendly staff member, who spoke excellent English, showed me a laminated menu of prepaid plans. I chose a "Happy Tourist" SIM with 15GB of high-speed data and unlimited throttled data after that, plus 100 minutes of local calls, valid for 30 days. The cost? A mere 499 THB (roughly $15 USD at the time).
She asked for my passport, scanned it, filled out a quick form, and then, the magic moment: she opened my phone's SIM tray, removed my home SIM, and popped in the new Thai SIM. She even configured the APN settings (Access Point Name, which essentially tells your phone how to connect to the network) for me. Within minutes, I saw the 4G icon appear, and a welcome text message in Thai (and English!).
Step 3: Instant Connection, Instant Relief
I immediately opened Google Maps, typed in my hostel address, and navigated with ease. I sent a WhatsApp message to my family, shared a story on Instagram of the airport chaos, and even checked local bus routes. The relief was palpable. No more worrying about data limits, no more searching for dodgy public Wi-Fi. I was connected, legitimately, and affordably.
This experience wasn't unique to Thailand. I've replicated it in Vietnam with Viettel, in Mexico with Telcel, in Italy with Vodafone, and in countless other places. The process is remarkably similar: find a reliable vendor, choose a prepaid plan, provide your passport, and let them install it.
### Beyond the Basics: Advanced Tips & Troubleshooting
You've got your local SIM – congratulations! Now, let's maximize its potential.
1. Topping Up (Recharging): Most prepaid plans have an expiry. If you're staying longer, you'll need to "top up" or "recharge." You can usually do this at:
* Convenience stores: 7-Eleven, FamilyMart, etc., are ubiquitous in many countries. Just tell the cashier your phone number and the amount you want to add.
* Official carrier stores: They can top you up and help with plan changes.
* Online/App: Many carriers have apps where you can manage your account and top up using a credit card.
* Local ATMs: Some ATMs offer mobile top-up services.
Check your balance: Dialing a specific code (e.g., 121# in some countries) will show your remaining data and credit. This is crucial to avoid running out unexpectedly.
2. Using Your Phone as a Hotspot: One of the best perks! With a local SIM, you can often use your smartphone as a personal Wi-Fi hotspot, allowing your travel companions or other devices (like a tablet or laptop) to share your data connection. This is a lifesaver for group travel or when you need to get some work done. Just be mindful of your data limits if you're streaming heavily.
3. Dealing with Language Barriers: While many airport staff or official store employees will speak some English, this isn't always the case, especially in smaller towns.
* Google Translate: Download the offline language pack for the local language. You can type, speak, or even point your camera at text to translate.
* Write it down: Have the plan name and cost written down to show the vendor.
* Be patient and polite: A smile and a "thank you" (in their language, if possible) go a long way.
4. APN Settings: Occasionally, your phone might not automatically configure the network settings. If you’re not getting data, do a quick Google search for "[carrier name] APN settings [phone model]". You’ll find guides on how to manually enter these in your phone's settings. It sounds technical, but it's usually just inputting a few words into specific fields.
5. Specific Country Quirks:
* India: SIM card registration can be notoriously strict and time-consuming, sometimes requiring passport copies, photos, and local references. Plan for extra time.
* Japan: It's historically been harder to get prepaid SIMs for tourists, with many opting for pocket Wi-Fi rentals or data-only SIMs. However, options are improving, especially data-only SIMs from providers like Ubigi or specific tourist SIMs at airports.
* Europe (EU): If you buy a SIM in one EU country, the "Roam Like At Home" policy means you can often use it across the entire EU/EEA without extra charges (within fair usage policies). This is a huge bonus for multi-country European trips!
### The Unseen Benefits: More Than Just Savings
Getting a local SIM isn't just about saving money; it's about enriching your travel experience in ways guidebooks can't quantify.
* True Local Immersion: Want to order food delivery like a local? Hail a ride-share using a local app (like Grab in Southeast Asia or Uber/Bolt in other regions)? Find the best hidden gem restaurant that only locals know about? You need data. A local SIM empowers you to interact with the destination on its own terms, not just as a tourist looking in.
* Safety and Peace of Mind: In an emergency, having a working phone with a local number is invaluable. You can call local emergency services, contact your accommodation, or reach out to a new friend you made without worrying about international call rates. Plus, navigating an unfamiliar city late at night is far less stressful when you have reliable GPS.
* Spontaneous Adventures: That little cafe you just walked past? A quick search tells you it's got rave reviews and closes in 30 minutes – enough time for an espresso! A sudden downpour? Find the nearest museum or covered market. Local data turns every "what if?" into a "let's go!"
* Instagram-Worthy Moments, Instantly Shared: No more waiting for hotel Wi-Fi to upload that stunning sunset shot. Share your adventures in real-time, connect with fellow travelers, and make your friends back home jealous (in the best way!).
* Budgeting on the Fly: Compare prices for tours, check public transport schedules, find the nearest ATM without exorbitant fees, or even look up restaurant menus before stepping inside. All these small decisions add up to significant savings when you have constant access to information.
### Is a Local SIM Always the Best Option? (A Balanced View)
While I'm a huge advocate for local SIMs, it's worth acknowledging when other options might be more suitable:
* Very Short Trips (1-3 days): For a quick layover or a weekend trip, the effort of getting a local SIM might not outweigh the cost savings. An e-SIM or even light data roaming might be acceptable.
* Multiple Countries (Brief Stays): If you're hopping between several non-EU countries for only a day or two each, an e-SIM that covers multiple regions could offer more convenience, even if it's slightly pricier than individual local SIMs.
* Older Phones: If your phone doesn't support e-SIMs and you frequently travel, a local physical SIM is your best bet.
* Digital Nomads with Fixed Locations: If you're staying in one place for months and relying heavily on Wi-Fi for work, a local SIM is still great for on-the-go, but you might find yourself using less data overall.
For the vast majority of travelers, especially those spending more than a few days in a single country, or exploring a region like the EU, the local physical SIM card remains the most cost-effective, reliable, and immersive way to stay connected.
### My Personal Challenge to You: Connect Like a Local!
My journey from that staggering €450 phone bill to confidently buying a 30-day unlimited data plan for $10 in Vietnam has been transformative. It’s not just about the money saved (which, believe me, adds up to hundreds, if not thousands, over time). It’s about the freedom. The freedom to explore without limits, to connect with people, to navigate bustling cities and remote landscapes with equal ease.
So, on your next adventure, ditch the guidebooks' outdated advice on connectivity. Forget the expensive roaming packages and the frustrating Wi-Fi hunts. Embrace the local SIM card. It's a small act of preparation that unlocks a world of authentic experiences, deeper immersion, and incredible savings.
Your phone is your most powerful travel tool – learn to wield it wisely. Go ahead, try it on your next trip. You'll thank me when your phone bill arrives, looking delightfully slim, and your travel memories are rich with every spontaneous, connected moment.
What's your local SIM card adventure story? Share your tips and triumphs in the comments below! Let's help each other stay connected and save big!
Visual journey


Tags
Share this adventure
Join the travel community
New adventures, cultural insights and travel inspiration, straight to your inbox.
We may receive a commission if you click on a link and buy a product, service or policy, at no extra cost to you. How affiliate links work.
Been there?