
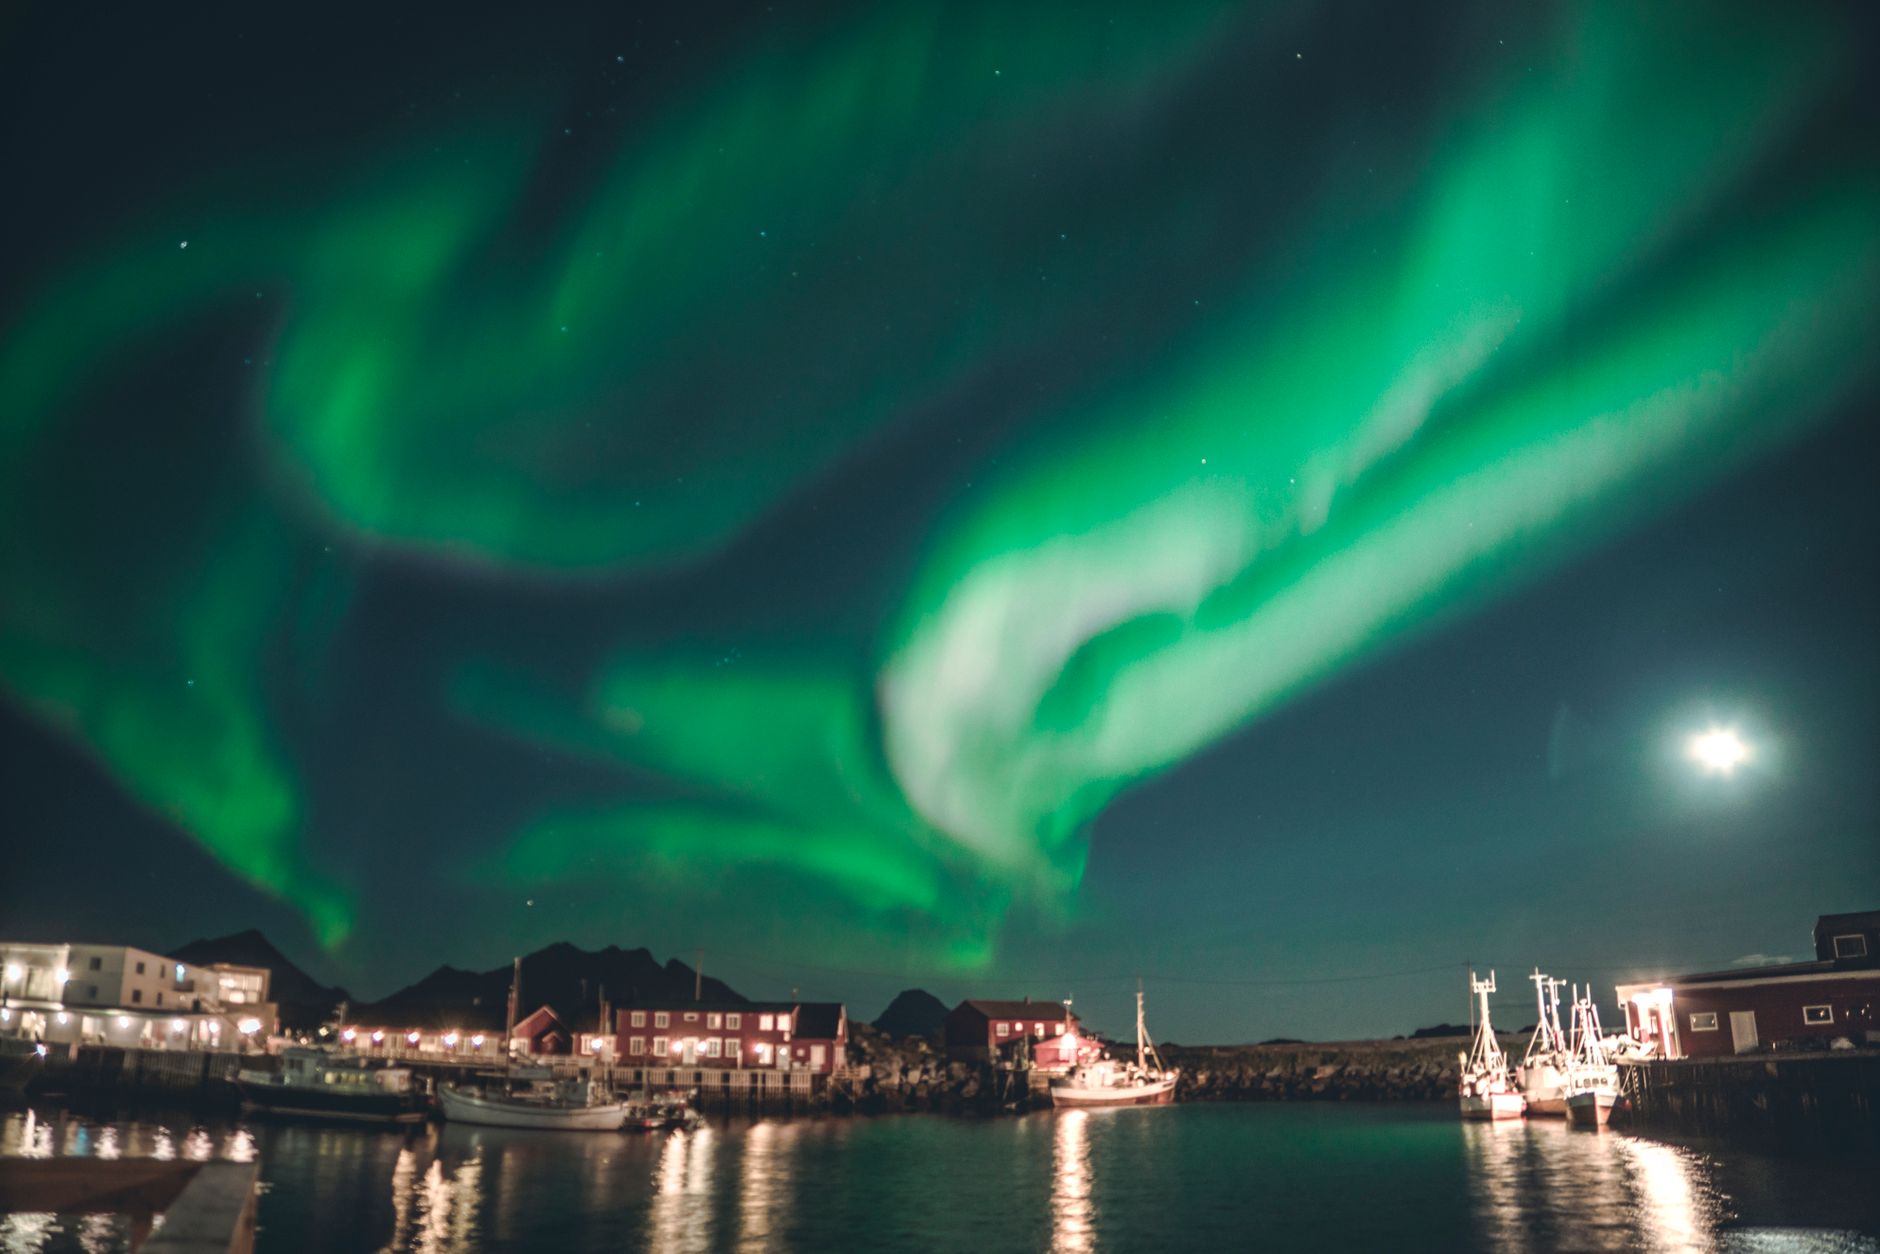
My journey to capture the elusive Northern Lights was a saga of cold nights, blurry photos, and near misses. But after years of chasing, I finally cracked the code, transforming frustrating failures into breathtaking, award-worthy shots – a phenomenon so mesmerizing, I simply can't stop going back for more. This is my story, and my ultimate guide, to photographing the aurora borealis. ---
## Aurora Obsession: How I Finally Mastered Northern Lights Photography (And Why I Keep Going Back!)
The air bit at my exposed skin, the kind of deep, numbing cold that makes your bones ache. My fingers, despite thick gloves, felt like clumsy sausages fumbling with camera dials. Above me, a faint, almost imperceptible green smudge appeared in the inky blackness. "Is that it?" I whispered, my breath fogging the viewfinder. I snapped a shot, waited an agonizing 20 seconds, and checked the screen. A blurry, green-tinged mess. My first attempt at photographing the Northern Lights was, to put it mildly, a spectacular failure.
That was years ago, on a hurried trip to Iceland. I’d seen the aurora with my own eyes – a fleeting, ethereal dance – but my camera had utterly failed to capture its magic. It left a sting, a challenge, an obsession. I knew I had to go back, not just to see it again, but to capture it. And capture it I did. Now, I’m not just a seasoned aurora chaser; I'm an aurora photographer, returning to the Arctic Circle year after year, drawn by the irresistible siren call of the dancing lights. This isn't just a guide; it's the story of my journey, the lessons learned, and the comprehensive blueprint for you to finally capture the aurora borealis like a pro.
### The Obsession Begins: A Saga of Frustration and Frozen Fingers
My initial attempts at aurora photography were less "artistic pursuit" and more "comedy of errors." My first trip to Iceland, driven by a spontaneous decision and fueled by a vague understanding of "long exposure," resulted in a memory card full of disappointment. I had a decent camera, but no tripod, no remote shutter, and absolutely no idea about manual settings. The few times the aurora did show, my photos were either blurry streaks, overexposed blobs, or simply too dark to discern anything.
Then came a quick trip to Finnish Lapland. Better gear, but still lacking crucial knowledge. I’d stand in freezing temperatures for hours, only to return with images that barely hinted at the vibrant spectacle I’d witnessed. The frustration was real. I’d see other photographers posting stunning shots, and I’d wonder: what was their secret? Was it just luck? Better cameras? Or was there a deeper science and art to it that I was missing?
The turning point came when I realized that chasing the aurora isn't just about being in the right place at the right time; it's about being prepared for that moment. It's about understanding the science, mastering your gear, and having the patience of a saint. My failures weren't due to a lack of aurora, but a lack of preparation. And that's when my true aurora education began.
### The Turning Point: Research, Gear, and the Art of Prediction
I dove headfirst into research. I devoured articles, watched countless YouTube tutorials, joined aurora photography forums, and even consulted meteorology blogs. It became clear that success wasn't about wishing; it was about meticulous planning.
1. Decoding the Aurora Forecast:
The first step was understanding the KP index – a scale from 0 to 9 measuring geomagnetic activity. A KP of 3-4 is good for seeing the aurora, 5+ is spectacular. But it's not just the KP index; you also need clear skies. I started using apps like "My Aurora Forecast" and "Aurora Alerts" religiously. These apps combine KP data with cloud cover forecasts, often even predicting the best viewing times for specific locations. I also learned to check local weather forecasts for cloud cover, as microclimates can mean clear skies just a short drive away from a cloudy town.
2. Mastering the Moon:
While a full moon can illuminate your foreground beautifully, making for stunning compositions, it also washes out fainter auroras. For truly vibrant displays, a new moon or a crescent moon phase is ideal, offering maximum darkness. I started planning my trips around these lunar cycles.
3. The Right Gear (No Compromises!):
This was a major investment, but absolutely essential. My early failures taught me that a smartphone or basic point-and-shoot simply won't cut it.
* Camera Body: A full-frame DSLR or mirrorless camera with good low-light performance is key. I personally shoot with a Sony Alpha a7R IV, but models like the Nikon D850, Canon EOS R5, or even older full-frame models like the Nikon D750 or Canon 6D Mark II are excellent choices.
* Wide-Angle Lens: This is arguably the most critical piece of gear. You need a fast lens (low f-stop) to gather as much light as possible and a wide focal length to capture the vastness of the sky. My go-to is a Sigma 14-24mm f/2.8 Art lens. Other great options include the Sony 12-24mm f/2.8 GM, Nikon 14-24mm f/2.8, or any f/2.8 or wider prime lens (e.g., 20mm f/1.8).
* Sturdy Tripod: Non-negotiable. You’ll be doing long exposures, so stability is paramount. A lightweight but robust carbon fiber tripod (like a Manfrotto Befree Advanced or Peak Design Travel Tripod) is worth its weight in gold.
* Remote Shutter Release: Wired or wireless, this prevents camera shake when you press the shutter button. You can also use your camera's 2-second timer.
* Extra Batteries: Cold drains batteries at an alarming rate. I always carry at least three fully charged spares, kept warm in an inner pocket.
* Headlamp with Red Light: Essential for navigating in the dark without ruining your night vision or other photographers' shots.
* Warm Clothing: Layers, layers, layers! Thermal base layers, fleece mid-layers, a heavy down jacket, waterproof outer shell, insulated pants, thick wool socks, waterproof insulated boots (rated for extreme cold), and the warmest gloves you can find (with finger-tip access for camera controls). Hand warmers and toe warmers are lifesavers.
* Thermos: Filled with hot tea, coffee, or chocolate. Trust me, you'll thank yourself at 3 AM.
4. Budgeting and Planning a Dedicated Trip:
Chasing the aurora isn't cheap, but it's an investment in an unforgettable experience. I started setting aside funds specifically for aurora trips. Flights, accommodation, car rental (often essential for chasing clear skies), and potentially guided tours all add up. For a week-long trip to a prime location like Norway, expect to budget anywhere from $2,000 to $5,000+ per person, depending on your style of travel and whether you opt for luxury or budget-friendly options.
### The Chosen Battlefield: Tromsø & Lofoten, Norway
After much deliberation, I chose Northern Norway as my primary aurora hunting ground. Why Norway? Its high latitude, dramatic fjords, and relatively mild coastal climate (thanks to the Gulf Stream) make it a consistent hotspot. The infrastructure for tourism is excellent, and the locals are incredibly knowledgeable about the aurora.
Tromsø: The Gateway to the Arctic
My first truly successful aurora trips were based out of Tromsø. This vibrant city, often called the "Gateway to the Arctic," is perfectly situated above the Arctic Circle.
* Accessibility: It has an international airport, making it easy to reach.
* Aurora Tours: Tromsø boasts a plethora of aurora tour operators, from large bus tours to small-group minivan chases with professional photographers. These guides are invaluable, using local knowledge and real-time cloud tracking to find clear skies. Expect to pay around $150-250 USD for a bus tour, or $500+ for a private guide. I highly recommend a smaller group tour for a more personal experience and better photo opportunities.
* Dark Sky Locations: Even near Tromsø, there are stunning dark sky locations like Kvaløya island, offering epic backdrops of mountains and fjords.
Lofoten Islands: A Photographer's Dream
Once I gained confidence, I ventured further south to the Lofoten Islands. This archipelago is a landscape photographer's paradise, renowned for its jagged peaks, picturesque fishing villages (rorbuer), and white-sand beaches.
* Dramatic Scenery: Imagine the aurora dancing over iconic locations like Hamnøy, Reine, or the beaches of Uttakleiv and Skagsanden. The foreground potential here is unparalleled.
* Self-Drive Adventure: Lofoten is best explored with a rental car, allowing you the freedom to chase clear skies and find unique compositions. Roads can be icy, so winter tires and caution are essential.
* Accommodation: Staying in traditional rorbuer (fisherman's cabins) adds to the authentic experience. Prices can range from $100-300+ per night depending on size and amenities.
My strategy usually involves flying into Tromsø for a few nights of guided chases, then heading to Lofoten for a week of self-guided exploration, giving me the best of both worlds.
### The Art of the Chase: My Best Tips for Photographing the Aurora
This is where the rubber meets the road. After countless cold nights and trial-and-error, I've refined my technique.
1. Patience is Your Greatest Virtue:
The aurora is fickle. You might wait hours in sub-zero temperatures for a faint glow, or it might erupt into a dazzling display within minutes of your arrival. Embrace the wait. Bring snacks, hot drinks, and good company. Sometimes, the most magical moments happen after everyone else has given up and gone inside.
2. Master Your Camera Settings (The Aurora Cheat Sheet):
These are my go-to starting points, but always be prepared to adjust!
* Manual Mode (M): Full control is essential.
* Aperture (f-stop): As wide as your lens allows (e.g., f/2.8, f/1.8, f/1.4). The wider, the more light your camera can gather.
* ISO: Start at 1600-3200. If the aurora is faint, push it to 6400. If it's incredibly bright and fast-moving, you might even lower it to 800-1000 to reduce noise.
* Shutter Speed: This is highly dependent on the aurora's activity.
* 10-20 seconds: For faint, slow-moving, or diffuse aurora.
* 3-8 seconds: For bright, fast-moving, or "dancing" aurora to capture its structure without blurring.
* Focus to Infinity: Switch your lens to manual focus (MF). Zoom in on the brightest star in Live View, manually adjust focus until it's a sharp pinprick, then lock it there. Tape your focus ring if it tends to drift.
* RAW Format: ALWAYS shoot in RAW. This preserves maximum image data, giving you far more flexibility for post-processing adjustments (exposure, white balance, noise reduction).
* White Balance: I usually set it to Kelvin 3200-4000 for a natural, cool aurora color. Auto WB can be inconsistent. You can fine-tune this in post-processing.
* Disable Long Exposure Noise Reduction: While tempting, it doubles your exposure time, meaning you miss half the show. It's better to deal with noise in post-processing.
* Use a Remote Shutter or 2-Second Timer: To avoid any camera shake from pressing the shutter button.
3. Compose for Impact:
A photo of just the aurora, no matter how bright, can feel flat. Always look for compelling foreground elements:
* Mountains & Fjords: Classic Norwegian backdrops.
* Reflections: Calm water (lakes, still fjords) can create stunning mirror images.
* Trees & Cabins: Silhouettes add depth and scale.
* Human Element: A friend standing silhouetted, looking up at the lights, adds a powerful narrative. (Just ensure they stay still for the long exposure!)
* Leading Lines: Roads, paths, or shorelines can draw the viewer's eye into the scene.
4. Stay Warm, Stay Charged, Stay Safe:
* Layer Up! I can't stress this enough. When you're standing still for hours in sub-zero temperatures, you'll get cold fast.
* Batteries: Keep spare batteries in an inside pocket, close to your body heat.
* Lens Warmer: In humid cold conditions, your lens can fog up or frost over. A USB-powered lens warmer can be a lifesaver.
* Safety First: Always tell someone where you're going. Stick to known areas, especially if you're not with a guide. Be aware of icy conditions, especially near water.
### The Magic Unfolds: My Unforgettable Nights
My first truly successful night was outside Tromsø. The forecast was good, but not spectacular. We drove about an hour out of the city, away from the light pollution, to a quiet fjord. The sky was clear, and after about an hour of waiting, a faint green arc appeared. I set my camera, took a few test shots, and then, slowly, it began to grow. First, a gentle wave, then curtains of green, pulsing and swaying. My heart pounded. I was finally getting it right! The photos on my screen were sharp, vibrant, and exactly what I’d dreamed of. That night, the aurora danced for over two hours, and I shot hundreds of frames, each one a testament to the journey I’d taken. The sheer joy and relief were immense.
But the most breathtaking experience came on a later trip to Lofoten, at Uttakleiv Beach. It was a cold, crisp night with no moon. The air was so still you could hear the crunch of snow under my boots. I set up my tripod near some large, dark rocks by the water's edge. Suddenly, the sky exploded. Not just green, but streaks of pink and purple, swirling and twisting directly overhead. It was a "coronal" aurora, dancing with incredible speed and intensity. My shutter speed had to drop to 3-5 seconds to capture its defined structure. The aurora reflected perfectly in the calm water of the incoming tide, creating a mirror image that was simply otherworldly. I remember just standing there, alternating between frantically adjusting settings and simply staring up, tears welling in my eyes despite the cold. It was one of those moments that transcends photography – a profound connection to the universe.
Local guides have also been instrumental in these experiences. They know the secret spots, the microclimates, and can predict the aurora's behavior with uncanny accuracy. On one trip, our guide drove us over mountains and through snow squalls, only to emerge into a perfectly clear patch of sky where the aurora was already blazing. Their expertise is worth every penny.
### Why I Keep Going Back (And Why You Should Too!)
Some might ask, "Once you've seen and photographed it, isn't that enough?" My answer is an emphatic no. The aurora borealis is an addiction, a natural phenomenon so dynamic and unpredictable that no two displays are ever the same.
* Always Unique: Each aurora display has its own personality. Sometimes it's a gentle, ethereal glow; other times, it's a violent, pulsating storm of light. The colors, the shapes, the speed – it's endlessly varied.
* The Chase Itself: There's an undeniable thrill in the chase, in monitoring forecasts, driving into the unknown, and waiting in the silent darkness. It’s an adventure in itself.
* Connection to Nature: Standing under a sky ablaze with cosmic light is a humbling, spiritual experience. It puts everything into perspective and reminds you of the vast, incredible beauty of our planet and beyond.
* Beyond the Photo: While I love capturing the aurora, the experience of witnessing it with my own eyes is always paramount. The camera is a tool, but the memory is the true treasure.
* Sustainable Travel: Many Arctic regions rely on aurora tourism. By supporting local businesses, guides, and accommodations, you contribute to the local economy while respecting the environment.
I keep going back because the aurora calls to me. It's a journey of continuous learning, of pushing my photographic boundaries, and of repeatedly immersing myself in one of nature's most spectacular shows. It’s an experience that truly recharges my soul.
### Your Aurora Adventure Awaits!
My journey from frustrated amateur to aurora photography enthusiast has been one of the most rewarding experiences of my life. It taught me patience, persistence, and the power of preparation. If you've ever dreamt of seeing – and photographing – the Northern Lights, I hope this guide empowers you to make that dream a reality. It's not just about getting the perfect shot; it's about the adventure, the cold, the waiting, and that electrifying moment when the sky erupts in color.
So, pack your warmest clothes, charge those batteries, and start planning your Arctic adventure. The aurora is waiting. Are you ready to chase the lights? Share your aurora dreams or past experiences in the comments below! Don't forget to tag #TripsoraAurora when you share your incredible photos!
---
Visual journey


Tags
Share this adventure
Join the travel community
New adventures, cultural insights and travel inspiration, straight to your inbox.
We may receive a commission if you click on a link and buy a product, service or policy, at no extra cost to you. How affiliate links work.
Other angles on this trip
These notes are written by AI to show how different kinds of traveller might see this destination. They are not comments from real readers.